Virtual Media Library commonly called as smart mans Network Installation Manager, whereas VM library creates optical device by using ISO image and represents to VIO client partitions as a installable CD/DVD using SCSI vscsi protocol.
It’s been called smart mans NIM because of manageability is very easy as compare NIM. Also, we could use AIX installation (AIX 5.3 / 6.1 and 7.1) and up-gradation, booting related issues and root password recover and migration as well. If you could convert your mksysb image through mkdvd command which will convert mksysb image file to bootable iso image, through that image we can represent same mksysb image DVD to the client partitions in-order to recover.
VM Library gives you many benefits such that,
Normally recovering root password we need NIM server suppose to be same OS level as like client partition or higher version of NIM master can support . But, VM library doesn’t have any version dependency as such.
If any partition needs to be recovered immediately without any delay those times it helps, you don’t want to walk through datacenter simply move your image in to specific frame’s vioserver and start convert and use it.
You can keep multiple versions of ISO images whenever you required can be used without any delay.
VM Library option is very fast and quick because of image and data client partition everything would be there in same physical box whereas reads and writes are very fast data hence movement happens in same hypervisor.
Please find the detailed way of doing ISO image creation, VM library and partition restoration.
Considering that you have VIO server with you and it has minimum 30 GB of space,
STEP 1:- Create separate mount point with size of 10 GB

STEP 2:- Copy your mksysb image in to this mount point

STEP 3:- By using mkdvd command convert the mksysb to ISO image ,
![]()
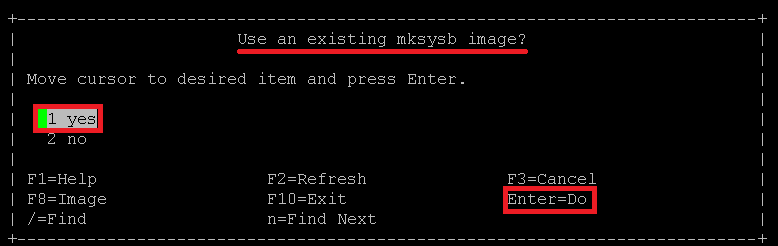
STEP 4:- As sson as you select there would be option given to you that , “Use an existing mksysb image” select yes and hit enter.
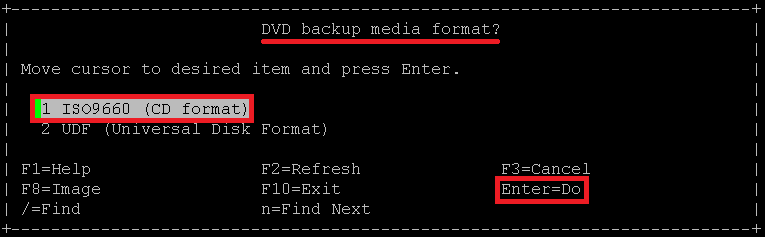
STEP 5:- Select DVD backup media format option as “ISO9660 (CD format) and hit enter.
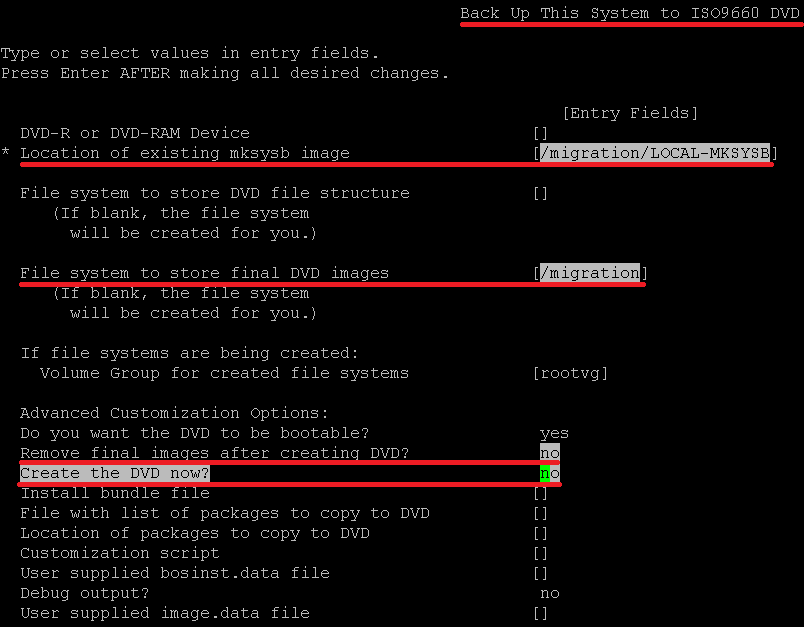
STEP 6- You have specify the image location and where you are going to store your ISO file
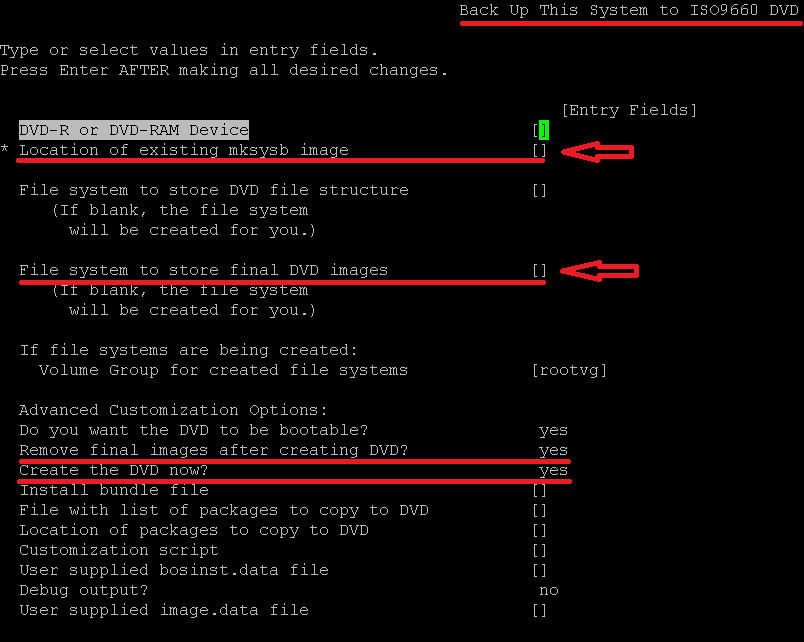
With input as per our scenario
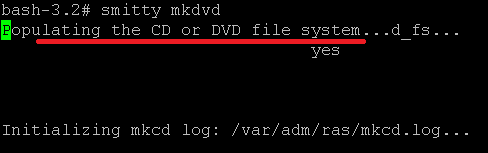
STEP 7:- As soon as you give the necessary inputs and hit enter to proceed further, which will show you the progress like this
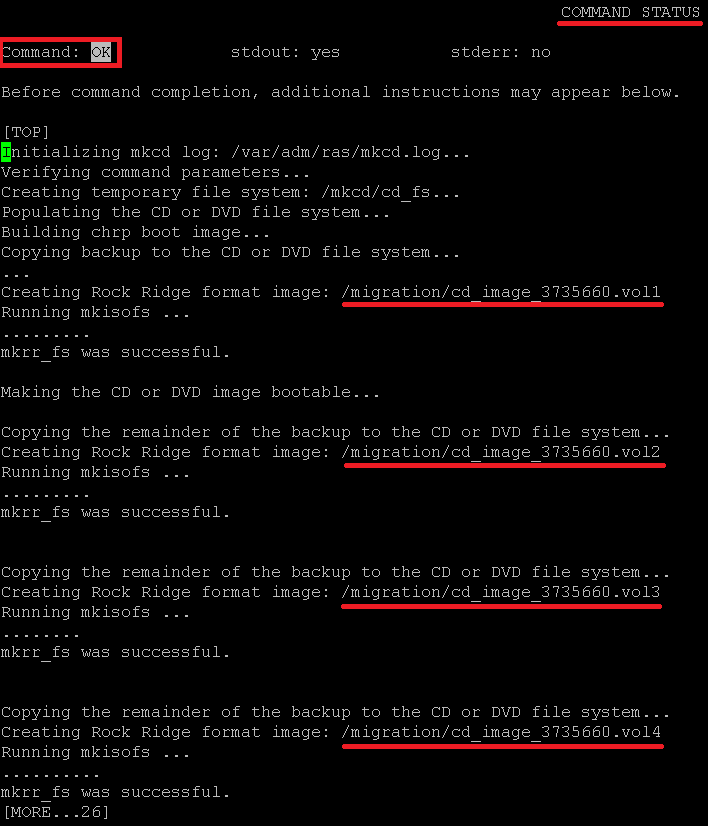
STEP 8- Once you hit enter, it will take some time depends upon the size of mksysb after completion logs shows as follows.
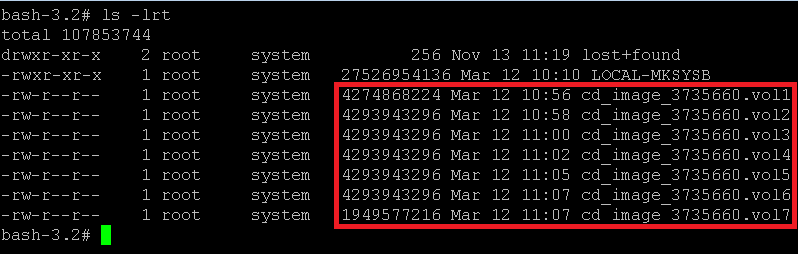
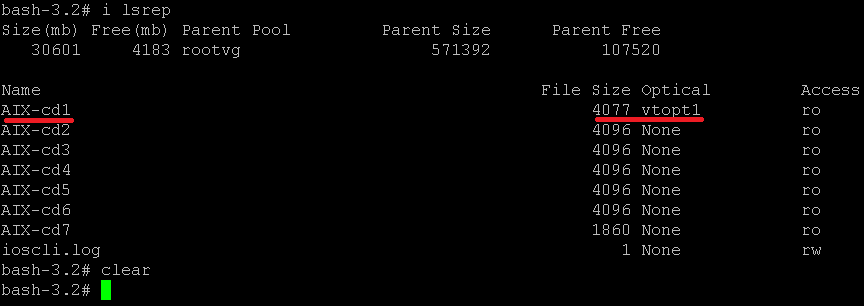
STEP 9:- Now you go back and check your location, you could see the ISO files based on size.

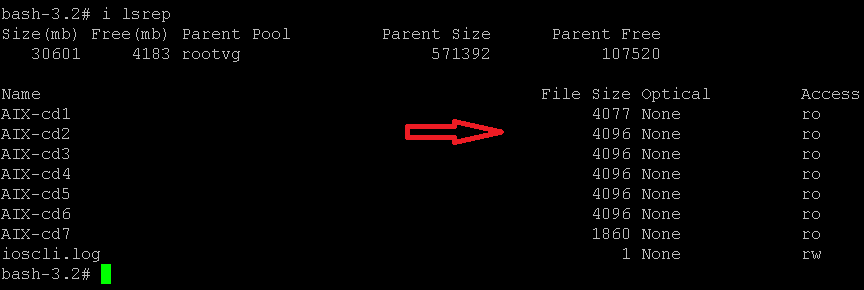
STEP 10:- Please ensure that is there any VM library exists ,

Note :- In-order to access both the shells we normally exports /usr/ios/cli/ioscli location as i

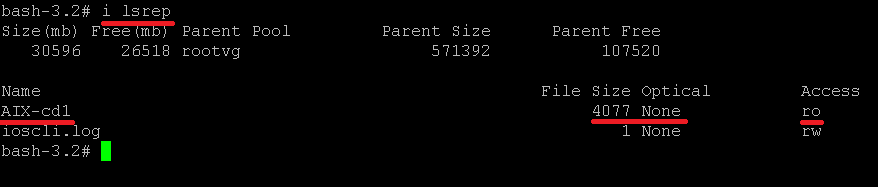
STEP 11:- Create repository by using mkrep command.


STEP 12:- Validate the repository whatever you created

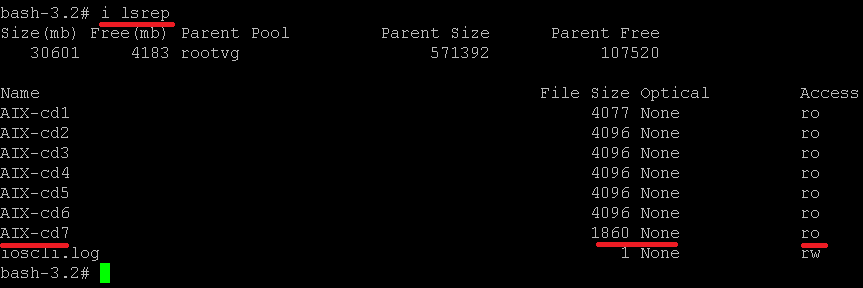
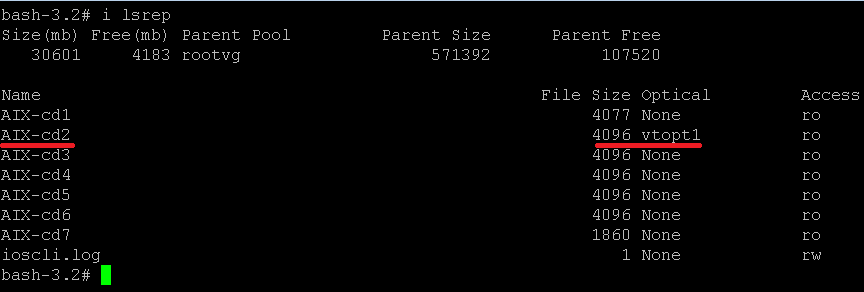
STEP 13:- Create a optical device by using mkvopt command,
![]()
STEP 14:- As soon as you create optical device that would be listed in your repository
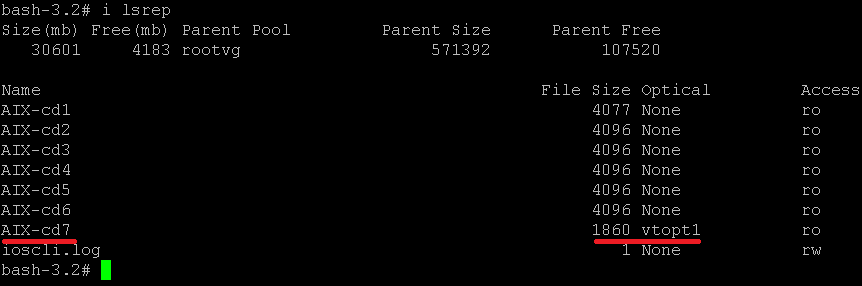
STEP 15:- Repeat the same until you create all optical devices, so I am giving last one.

STEP 16:- Now your VM library is ready for use ,

STEP 17:- Now you want chose your right client to exports the optical device,
STEP 18:- By using mkvdev command map the optical device to client partition

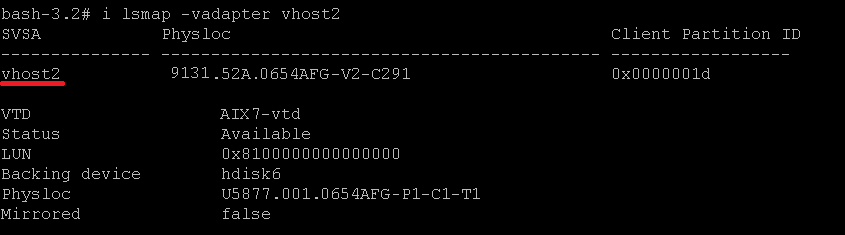
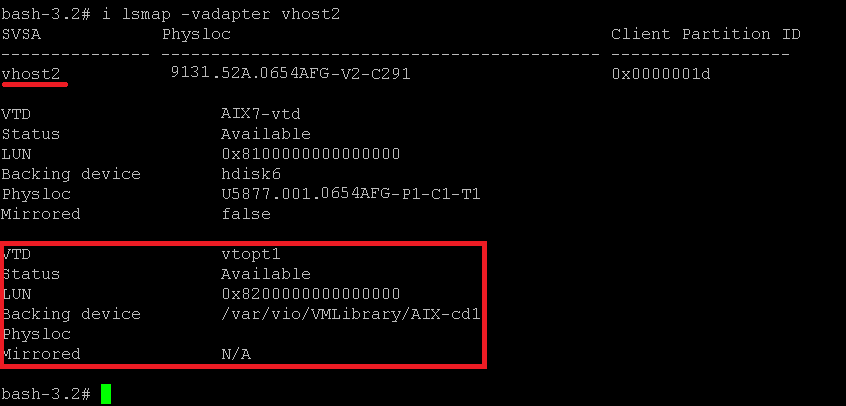
STEP 19:- Validated the optical device details
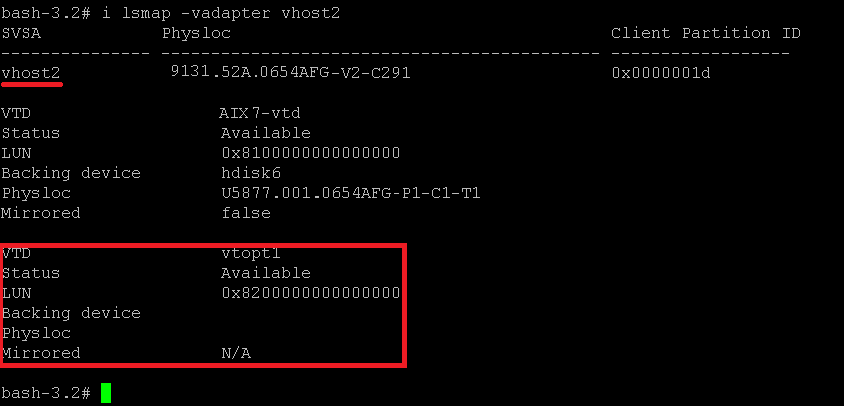
STEP 20:- Now you load the media optical media ,

Now you could see, first part of ISO image has been loaded
STEP 21:- Now check the vhost in detail, backing device details has been updated
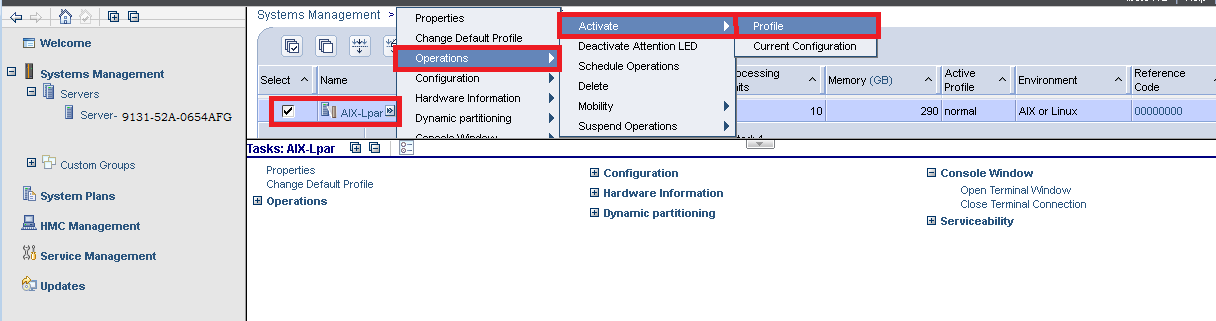
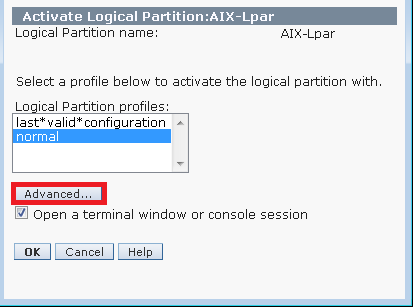
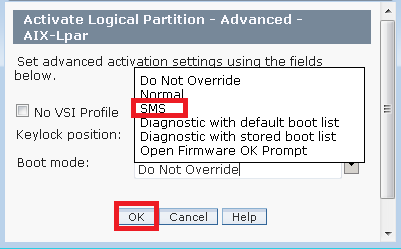
STEP 22:- Boot the partition in SMS mode,
STEP 23:- To open the console click the check box
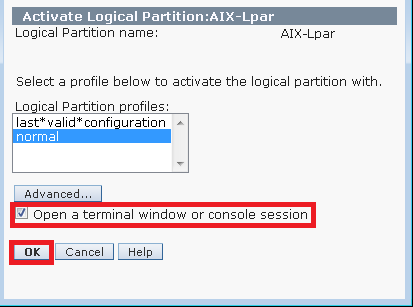
You could get the applet like this
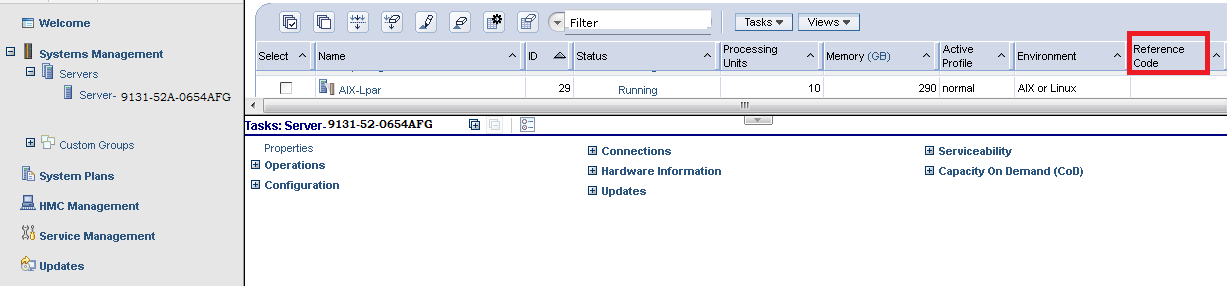
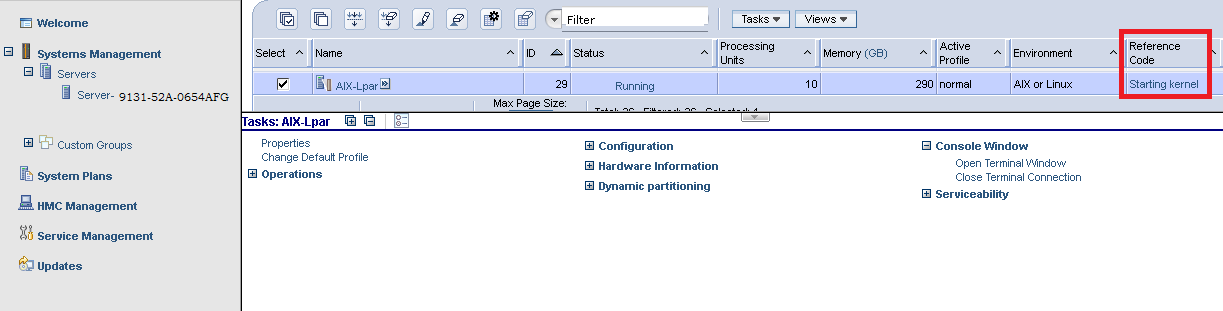
STEP 24:- You could see the partition booting sequence in reference code column
STEP 25:- Select boot option

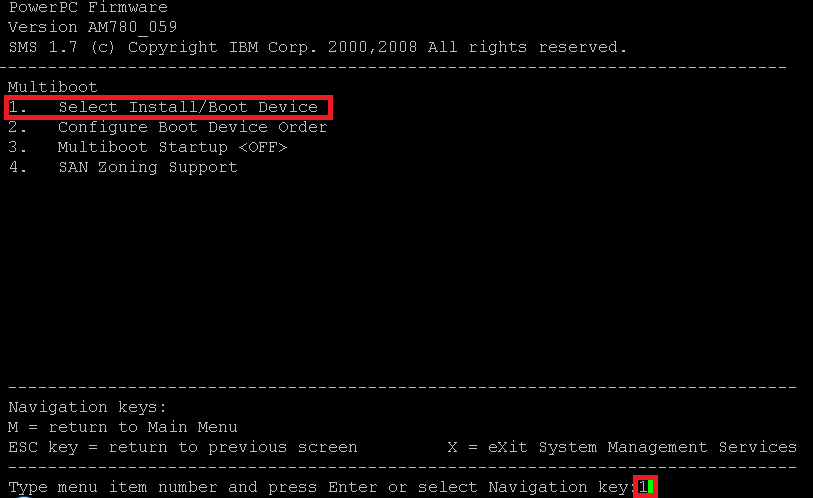
STEP 26:- Select install and boot device
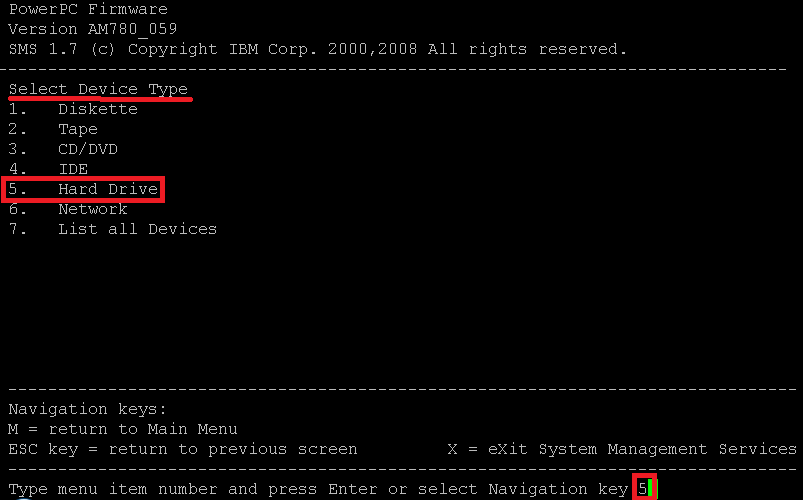
STEP 27:- Select device type
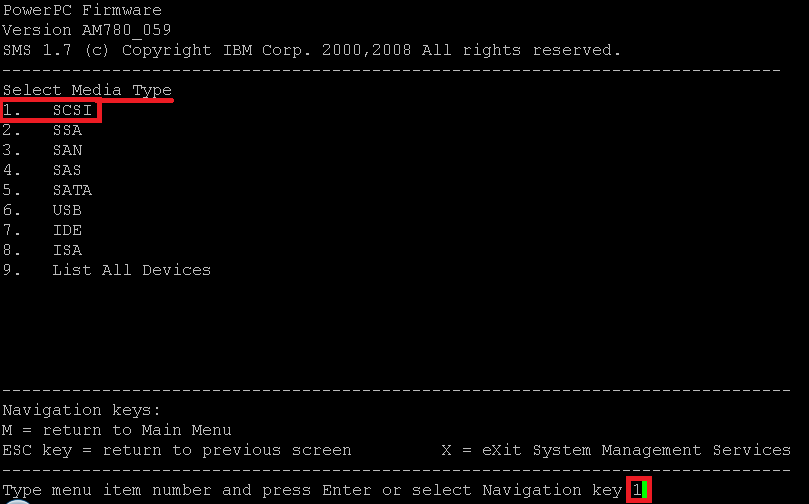
STEP 28:- Select the scsi device
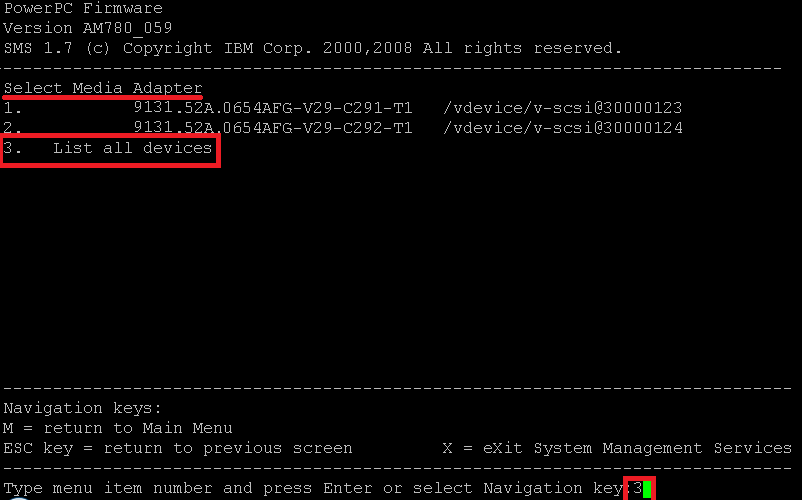
STEP 29:- Select media adapter
Select the DVD – ROM
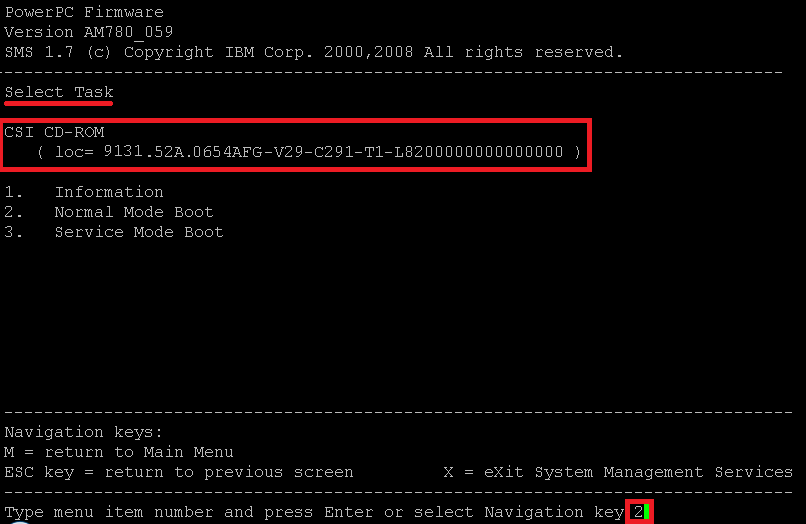
STEP 30:- Select the normal mode boot,
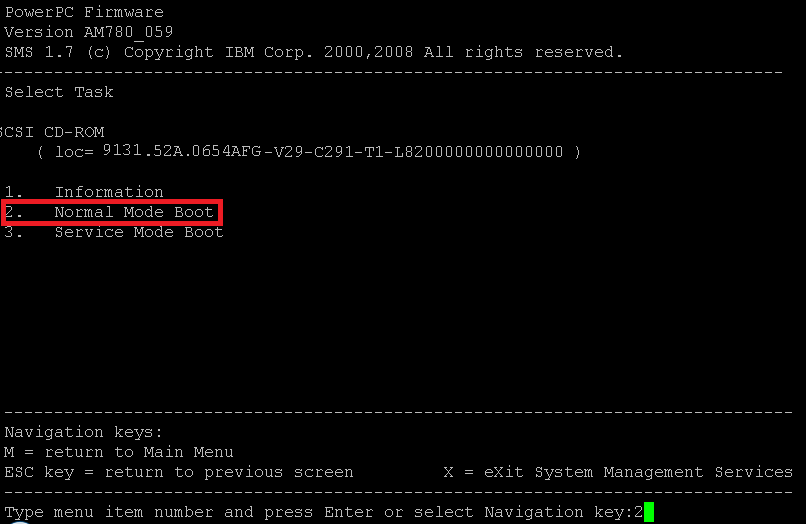
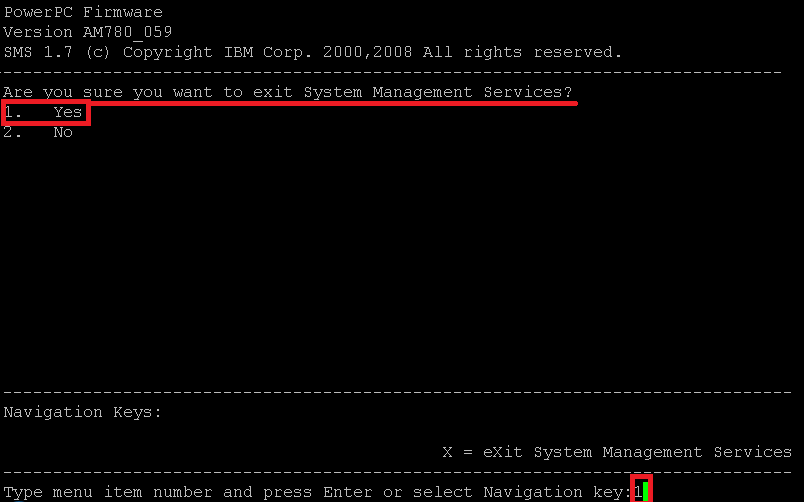
Select system management service.
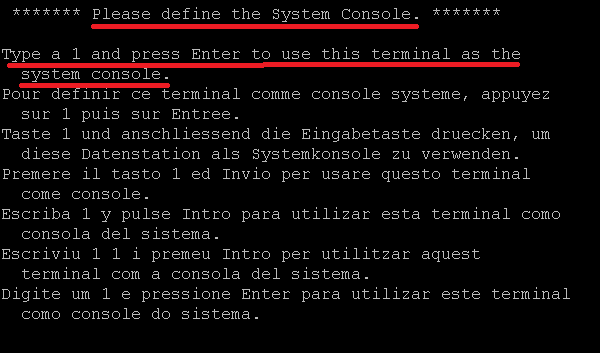
STEP 31:- To select the console
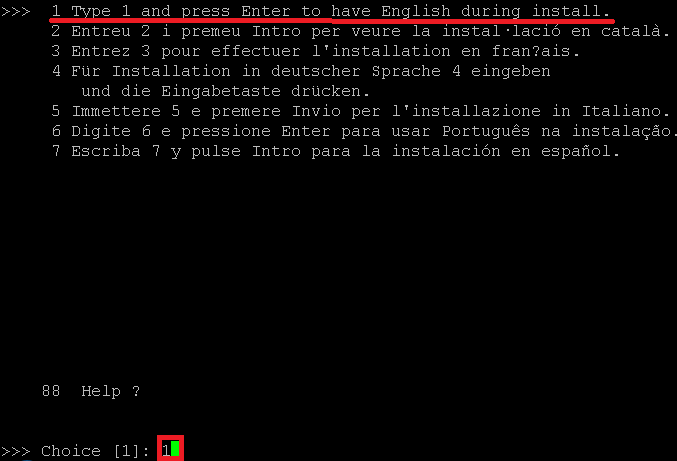
STEP 32:- Language selection
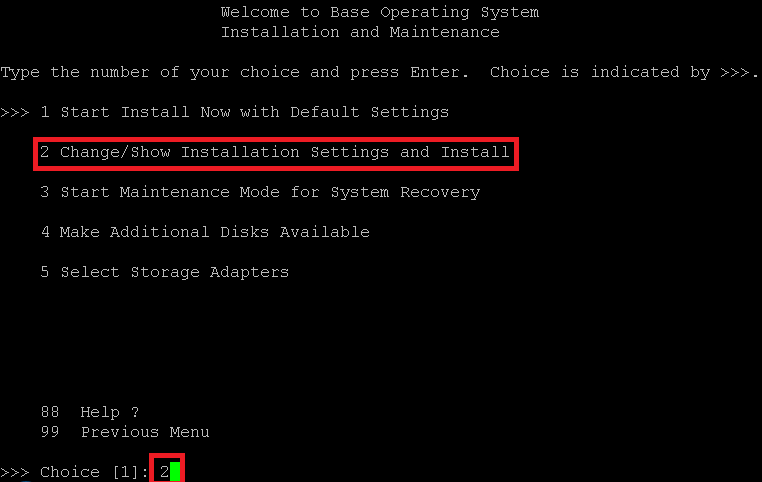
STEP 33:- Chose your option to install
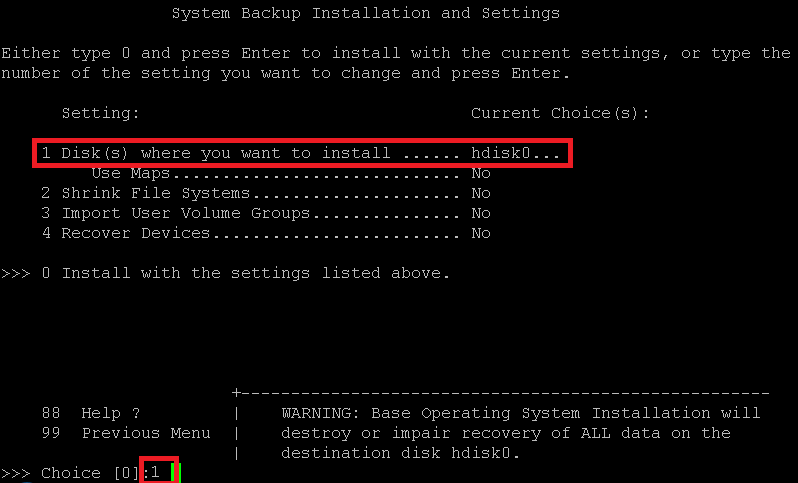
STEP 34:- If you want do any changes in disk selection
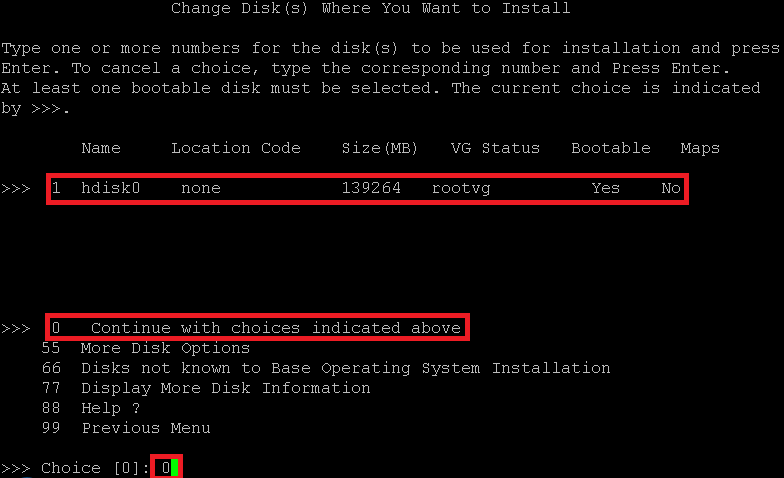
STEP 35:- Details after disk change settings
STEP 36:- Installation in progress details
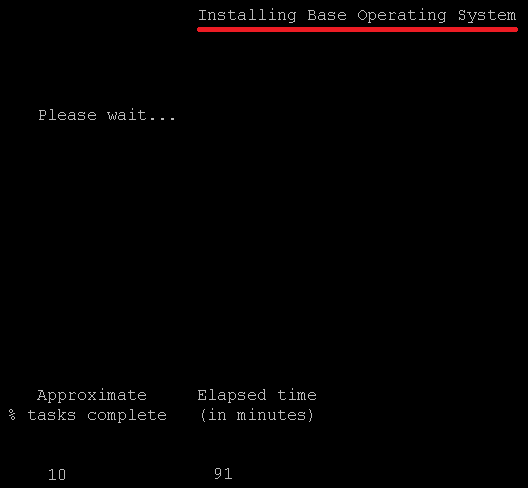
STEP 37:- Now Installation will ask you to insert the second media

STEP 38:- Unload the first DVD and load the second DVD

STEP 39:- Check the repository
STEP 40:- Load the second CD
![]()
It will ask load until the installation completes; you have to completes the loading and unloading
STEP 41:- Partition reboots,
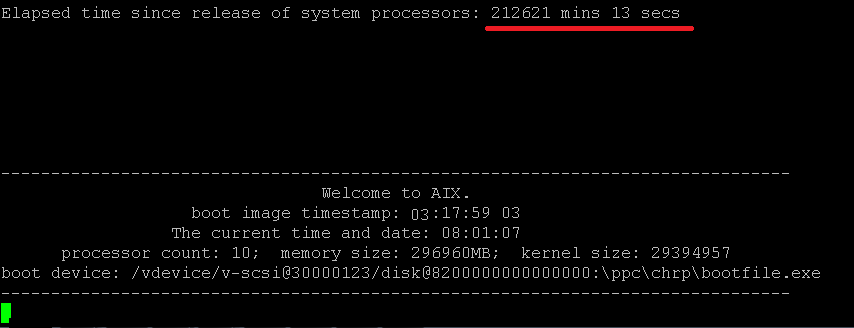
STEP 42:- Check partition would be up and running,